For Beginners: Yogurt Bread Starter (Leaven)
Hey everyone, it's Drew, welcome to our recipe page. Today, I'm gonna show you how to make a distinctive dish, For Beginners: Yogurt Bread Starter (Leaven). One of my favorites. For mine, I will make it a little bit tasty. This is gonna smell and look delicious.
For Beginners: Yogurt Bread Starter (Leaven) is one of the most popular of recent trending meals in the world. It's easy, it's quick, it tastes yummy. It is enjoyed by millions daily. They are nice and they look fantastic. For Beginners: Yogurt Bread Starter (Leaven) is something which I've loved my entire life.
Many things affect the quality of taste from For Beginners: Yogurt Bread Starter (Leaven), starting from the type of ingredients, then the selection of fresh ingredients, the ability to cut dishes to how to make and serve them. Don't worry if you want to prepare For Beginners: Yogurt Bread Starter (Leaven) delicious at home, because if you already know the trick then this dish can be used as an extraordinary special treat.
To begin with this particular recipe, we must first prepare a few ingredients. You can have For Beginners: Yogurt Bread Starter (Leaven) using 4 ingredients and 15 steps. Here is how you cook that.
Since this bread starter is made by adding flour to yogurt, it's easy to see how it's fermenting, unlike some other starters. You can store this starter in the refrigerator for about 5 days. If you leave a little leftover, use half the amount of water, bread flour and sugar in step 5, and incubate for 5-6 hours at room temperature you can grow more starter. If you do this twice, your starter will ferment better. If it takes on an "off" smell like a dishtowel, it's better to manfully throw it away.
To get a bread starter going, in the spring, summer and fall you can just let it rest at room temperature. In midsummer when it's very hot, put it in a cool location in your room when you're at home, and put it in the refrigerator when you go out if your house will get very hot. You can also put it in an insulated polystyrene container with ice packs to keep it at under 25 °C. In the winter, put the starter jar on top of the refrigerator, near the stove, near your electric water kettle or in your boiler room. You could also make a fermentation box using a thermostat meant for tropical fish aquariums and an insulated box. But don't put the starter in a very warm location. Recipe by mipon
Ingredients and spices that need to be Take to make For Beginners: Yogurt Bread Starter (Leaven):
- 80 grams Yogurt
- 20 grams Bread (strong) flour
- 3 grams Sugar
- 20 grams Bread flour to add later
Instructions to make to make For Beginners: Yogurt Bread Starter (Leaven)
- Sterilize the jar in boiling water. (Or moisten the jar and microwave for a minute.) Leave the jar to cool down. Water droplets on it are fine. You can use tap water for the starter.

- Put the yogurt, bread flour and sugar in the jar and mix. See Hints for where to place the jar.

- In midsummer when it's very hot, put it in a cool location in your room when you're at home, and put it in the refrigerator when you go out and your house will get very hot. In the winter, look for a place in your house where the temperature is around 20 to 25 °C. In our house in northern Hokkaido, we have the stove on all day, so near the stove is the best location for the starter. (See Hints.)

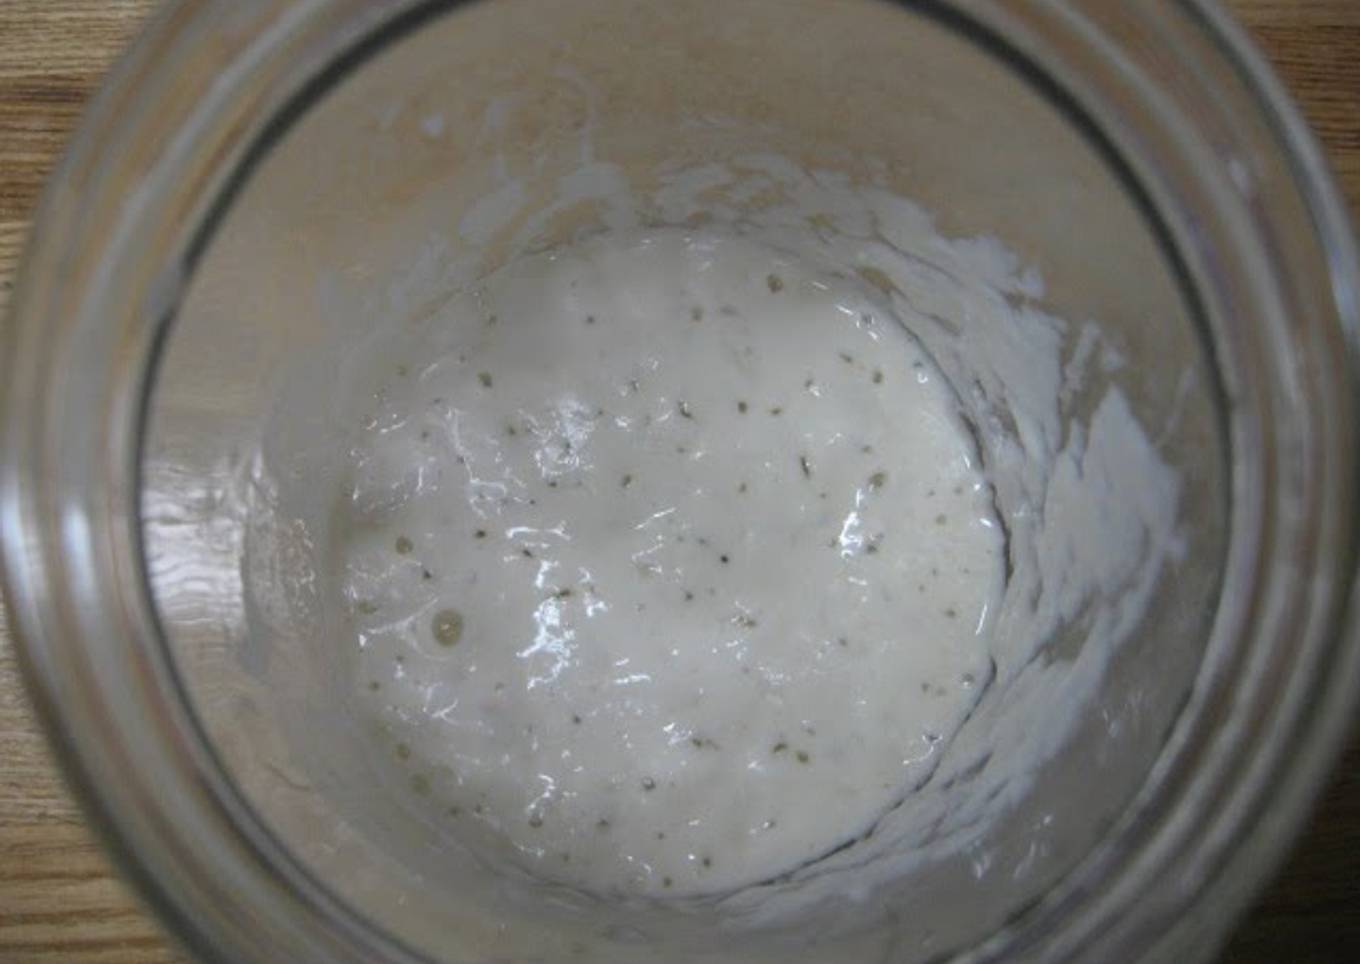
- Open the jar 2 to 3 times a day to incorporate air, and shake the jar lightly too. You can also mix it with a clean spoon. In 2 to 5 days you can see that it's fermenting and bubbling as shown in the photo. (You can make bread with this, using a ratio of 1 part starter to 2 to 4 parts bread flour.) If you aren't going to use it to bake bread right away, store it in the refrigerator.

- To add to the starter: Mix in 20 g of bread flour. Mark the top of the starter with a rubber band around the jar, so you can easily tell if it's increasing in volume. If the starter is not fermenting, mix it up about every 5 hours.

- After 5 hours, it should have doubled or tripled in volume. In this photos it's tripled in volume 10 hours later. (It usually does that in 5-6 hours.) If you let the starter rest in the refrigerator overnight after it's fermented, the dough you make with it will rise more. Bring the starter to room temperature before using it to make bread.

- If the starter doesn't increase in volume as shown in step 5 - give it an energy boost. Mix it up occasionally, and incorporate air into it. If it still isn't moving, feed it with a little sugar or honey (about 1/3 teaspoon). Mix it in, and then mix the starter occasionally while observing it.
- If the starter does ferment as shown in step 6 and then deflates again, that's fine - it means the yeast in it is very active, and the bubbles just burst. Try adding a little flour. If the starter is active, it will rise up again.
- To store the starter in the refrigerator as in steps 4 and 6, mix a bit less than 1/4 teaspoon of sugar in every 3 days. You can keep it in the refrigerator for about a week.
- What's an active starter? In step 6, it will have lots of bubbles and even have a net-like texture. If it has no air bubbles and looks slimy, it's not very active. Try mixing in a little sugar or flour. If it still doesn't get bubbly, use it to make foccacia, pizza crust,or crackers.
- Please refer to "For beginners: Basic bread Made with Yogurt Starter" -. It's an easy bread to bake with this starter.

- If making a liquid starter: Mix the yogurt, water and sugar in a 10:10:1 ratio. Leave for 3 to 4 days, and when it's bubbly it's done. Add an equal amount of bread flour to it, and when it's doubled or tripled in volume the starter sponge is done! If you keep feeding a liquid starter with sugar every 3 days, it will last for quite a long time.

- To keep a yogurt starter sponge going: Mix the sponge with about 1/4 of its weight in water and 1/4 of its weight in bread flour and mix. If it's not very active, feed it with a little sugar. You can keep the sponge going like this at least 2-3 times. You can add liquid starter instead of water.
- To make bread with starter that's not too sour: In the summer: if you keep the starter in a hot location, it will ferment fast and become sour, so if the ambient temperature is above 30 °C, after it has doubled or tripled in volume, put the starter in the refrigerator.
- In the winter: If you let the starter ferment for a long time at a cool temperature, it also gets sour easily. Add more sugar, and try to keep it in a warm location. Put it on top of the refrigerator, in the boiler room, or go to bed with it in your arms.
As your experience as well as confidence grows, you will locate that you have extra natural control over your diet plan and adapt your diet to your individual preferences gradually. Whether you intend to offer a dish that utilizes less or even more active ingredients or is a little bit more or less spicy, you can make simple modifications to accomplish this goal. Simply put, begin making your recipes on time. When it comes to basic cooking abilities for beginners you don't need to discover them yet only if you understand some easy cooking strategies.
This isn't a total guide to quick and very easy lunch recipes however its excellent food for thought. Ideally this will obtain your creative juices streaming so you can prepare scrumptious dishes for your household without doing way too many square meals on your journey.
So that's going to wrap it up with this exceptional food Recipe of Perfect For Beginners: Yogurt Bread Starter (Leaven). Thank you very much for your time. I am sure that you can make this at home. There's gonna be more interesting food at home recipes coming up. Don't forget to bookmark this page in your browser, and share it to your loved ones, colleague and friends. Thanks again for reading. Go on get cooking!


Comments
Post a Comment